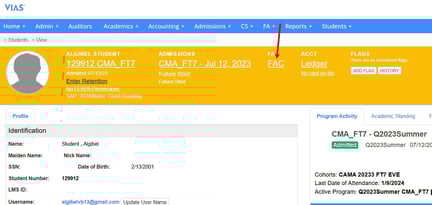
When completing Financial Aid tasks, ensure you are viewing the FA section of a student profile. This can be done in the following ways:
- Click the FA link within the search function

- Click on 'FAC' (or 'not FAC) at the top of a student's profile
Taking a Student from Lead to Enrolled
-
Creating an Estimated Award Letter (Financial Aid Offer)
- Award Letters talk directly to the student's ledger and the student portal.
- Click Here: How to Create Financial Aid Award Letters
-
Editing an Estimated Award Letter
- Award Letters can be customized for every student's unique Financial Aid situation
- Click Here: How to Input Information on the Financial Aid Award Letter
-
Creating and Editing Transaction Types
- Transaction Types
- Click Here: How to Create or Modify Transaction Types
-
Marking an Estimated Award Letter official and finalized
- This action will put the anticipated charges and funding from the Award Letter onto the student’s ledger.
- NOTE: Since this action directly affects the student's ledger it should only be completed once the Student has been enrolled into the school.
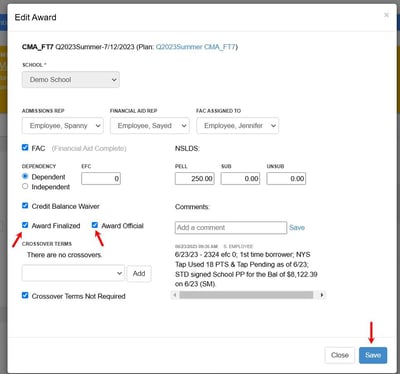
- To mark an Award Letter as official and finalized, navigate to the student's profile and click edit on the Award Letter
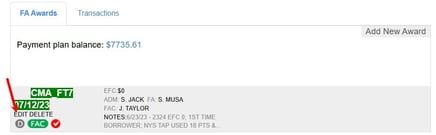
- Check the official and finalize boxes and then click 'save'
-
Creating Payment plans and sending the payment plan workflow to the student
- Payment plans can be created within the student profile. Once a payment plan is created, a workflow can be sent to the student's primary email address on file.
- Payment Plans will automatically appear on the student's ledger and portal.
- Click Here: How to Create Payment Plans
-
Marking relevant FA Status boxes for reporting
- Options selected in the FA Status tab can be tracked using the FA Status Report.
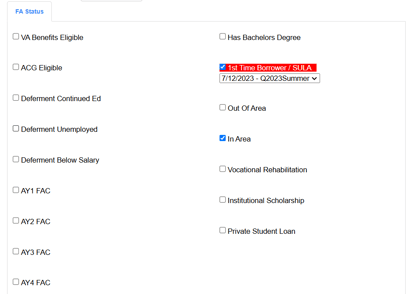
- Click Here: FA Status Boxes and FA Status Report
- Options selected in the FA Status tab can be tracked using the FA Status Report.
-
Notes, Activities and the Flag system
- Award Letter Notes - Notes can be added to an Award Letter at any time. These notes will be visible to all users who view the Award Letter. Additionally, Award Letter Notes will also appear on the printed copy of the Award Letter that is given to students.

- Activities - Numerous activities can be documented on the student profile.
- Flags - Flags may be added to a student's profile to designate important tasks the student must complete. Depending on the flag type, some may restrict a student’s access to certain functions of their portal, prompting them to complete their tasks quickly.
- Click Here: How to Add a Flag to a Student Profile
- Award Letter Notes - Notes can be added to an Award Letter at any time. These notes will be visible to all users who view the Award Letter. Additionally, Award Letter Notes will also appear on the printed copy of the Award Letter that is given to students.
-
Checking the Start List
- Start lists are created by the admissions department and can be viewed by the Financial Aid Department. Start lists can be utilized to track a student from Enrolled to Financial Aid Complete (FAC)
- Click Here: The Start List
-
Checking the Past Due Report
- The Past Due Report is a powerful tool for the Financial Aid department to process Financial Aid in a timely manner.
- Click Here: Past Due Report
-
Workflows
-
Workflows are a great automation feature that allows students to receive and sign documents. After a workflow is completed the document is uploaded into the student's documents on their profile.
- Click Here: How to Create and Send a Workflow
-
Reports – All reports relevant to Financial Aid
-
Past Due Report (PDR)
- The Past Due Report pulls all students who have past due funding on their ledger (at least 1 week past due)
- Navigate to Reports > Accounting > Past Due
- Click Here: Past Due Report
-
Crossover Report
- The Crossover Report pulls all students who had a crossover term indicated on their Award Letter
- Navigate to Reports > Financial Aid > Crossover Awards
- Click Here: The Crossover Report
-
KEES Report
- The KEES Report pulls all students who have a High School Graduation or GED completion date within the chosen date range
- Navigate to Reports > Financial Aid > Kees
-
Over 36 Hours Report (Grade Level 2 Report)
- The Over 36 Hours Report pulls all students who have completed 36 or more credits. This report assists in the packaging of grade-level 2 loans.
- Navigate to Reports > Financial Aid > Over 36 Hours Report
- Click Here: Grade Level 2 Report
-
Default Management
- The Default Management Report pulls information pertinent to reporting on Default Management to the Dept. of Ed.
- Navigate to Reports > Financial Aid > Default Mgmt Report
-
FA Status Report
- The FA Status Report will pull all students who have an FA Status checked on their profile.
- Navigate to Reports > Financial Aid > FA Status
-
Meetings
- The Meetings Report will pull meeting information to track advisor activity
- Navigate to Reports > Financial Aid > Meetings
- Meetings: Stats by advisor
- Navigate to Reports > Financial Aid > Meetings: Stats by advisor
- Meetings: No Enroll by Advisor
- Navigate to Reports > Financial Aid > Meetings: No Enroll by Advisor
-
Student Status
- The Student Status Report pulls the current status of all students within the requested time frame
- Go to Reports > Financial Aid > Student Status
-
All Transactions
- Navigate to Accounting > Student Ledger > All Transactions. The All Transactions Report can pull (but is not limited to) transactions by:
- Transaction Type
- Student Group
- Program Start Date
- Timeframe
- Anticipated only
- Actual only
- Student Status
- Click Here: All Transactions Report
-
Program Action Report
- The Program Action Report pulls a list of students by their program and program action. This report is helpful when a list of students who have withdrawn, canceled, graduated (etc.) is needed
- Navigate to Reports > Students > Program Actions
- Click Here: Program Actions Report
-
Active Report
- The Active Report pulls a list of all active students
- Go to Reports > Students > Active
- Click Here: Active Report
Financial Aid Best Practices
-
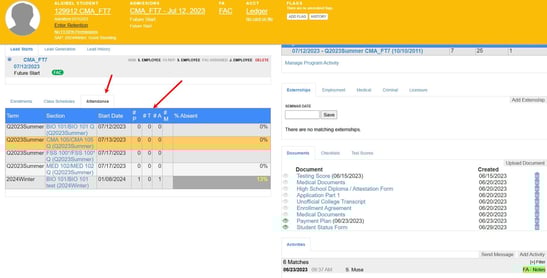
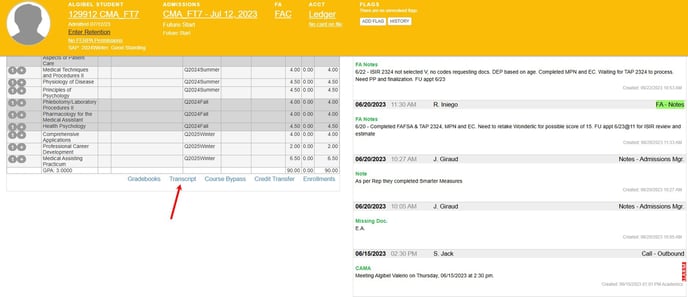
Viewing the Enrollment Grid
- The enrollment grid is located on the student's profile
- The enrollment grid displays all of the students currently enrolled courses, future enrollments, and completed credits

-
Viewing a student's Attendance
- Student Attendance can be viewed by clicking the Attendance tab
- Student Attendance can be viewed by clicking the Attendance tab
-
Accessing Program Plans
- Click Here: How to Access Program Plans
-
Communicating with a Student through VIAS
- Text/Emails can be sent directly within VIAS in the activities section of the student's profile.
- Mass texts/emails can be sent by adding multiple student names to the recipient(s) field
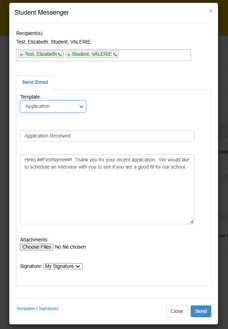
- Click Here: How to Email and Text Message a Student or Lead
-
Documents
- Click Here: How to Upload Documents to the Student Profile
- Click Here: How to Search for Uploaded Student Documents
-
Student Status Forms
- Student Status forms are automatically generated and sent to the appointed school representatives anytime a student status is changed. The student status form will automatically be uploaded on the student document page.
- Click Here: Student Status Forms
-
Program Activity
- Click Here: How to View the Program Activity Tab
-
Academic Standing
- Click Here: Academic Standing
-
Education History
- Click Here: How to Access Education History
-
Accessing/Printing Transcripts
- Transctips can be accessed within the Student's profile
- Transctips can be accessed within the Student's profile
-
ISIR Batch Upload
- Click Here: How to Batch Upload ISIR
-
Students Ledger
- Student Ledgers can be found by clicking the 'AC' filtered view when searching for a student or by clicking the ledger link at the top of a student’s profile.
Search option: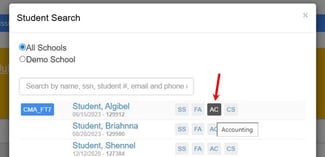
Profile View option: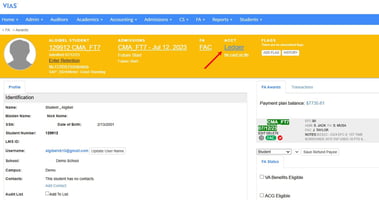
- Click Here: How to access Student Ledgers