When adding a program plan, VIAS will generate the number of terms and courses. The student's FA award letter is attached to the student's program plan. Adding a plan will generate the student's Last Date of Attendance, projected graduation date, and enrollment grid within the student service filter and Program Activity tab.
Adding a program plan
1. Within the Program Activity Tab within the student service filter, go to "Manage Program Activity."
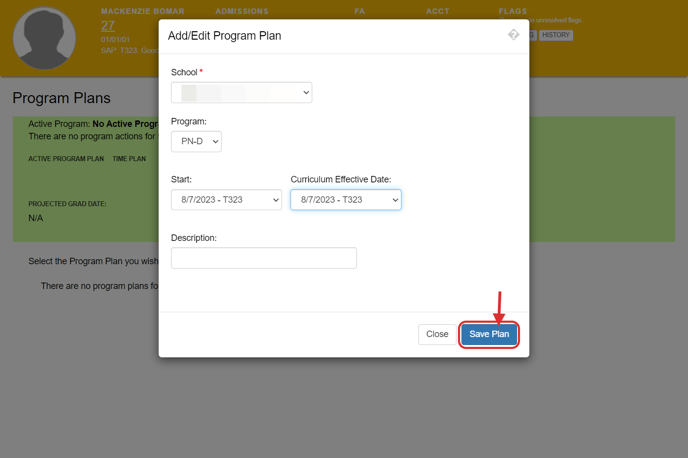
2. Within the green Active Program box, click Add New Plan.

3. Choose the school/campus.
4. Choose the student's program.
5. Choose the start date.
6. Choose the curriculum start. These dates are most often the same date.
7. Add a description if needed about the program plan.
8. Click Save Plan.
Now a program plan has been added. If this plan is added early in the admission process, the rep can use this plan to demonstrate to the student what classes will be taken in each term. OR use this exploratory plan to create a schedule to meet the needs of the student to create a projected grad date.
Adding a program plan template
1. Click the blue program plan name.
2. Load the program plan template, by selecting the program name.
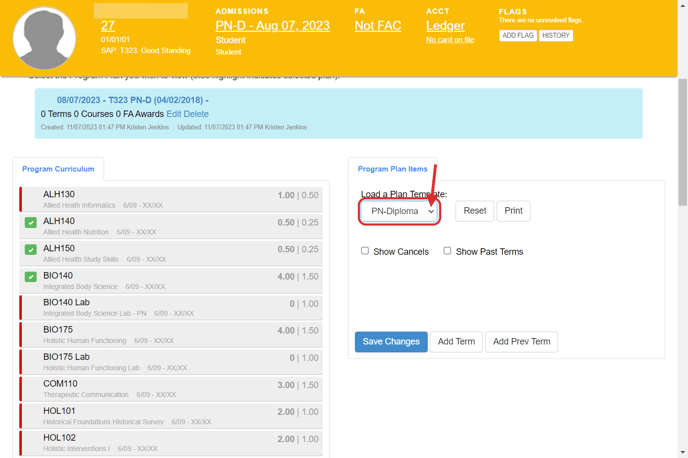
3. Courses can be dragged and dropped into different terms if needed. Terms can be added to meet the needs of the student.
4. Otherwise the default program plan template will load that was pre-determined or outline in your school's catalog.
5. Click Save Changes.

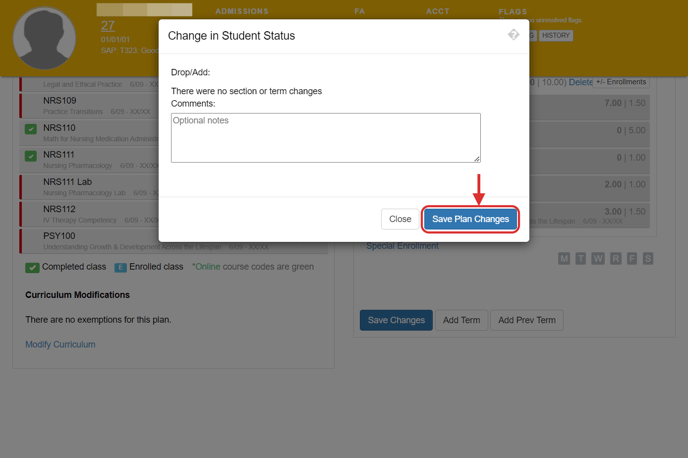
6. Changes for each term will appear in the drop/add sections.
7. Optional Notes can be added about the changes or plan.
8. Click Save Plan Changes.
Once the program plan changes are saved, all changes will be documented on a student status form that will be sent to the creator and FA. The student status form is located within the students documents for future reference.
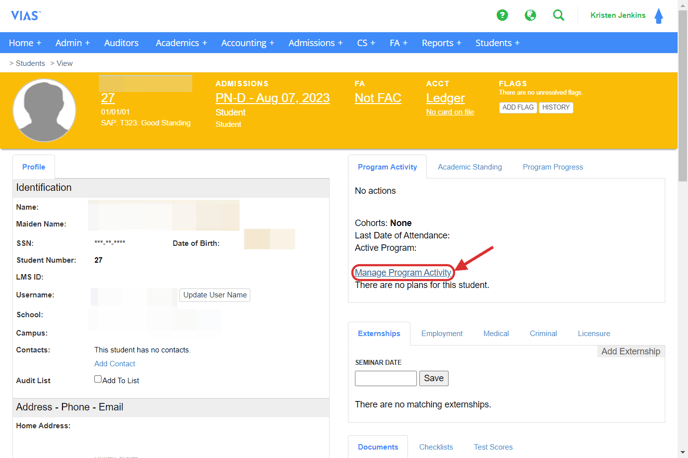
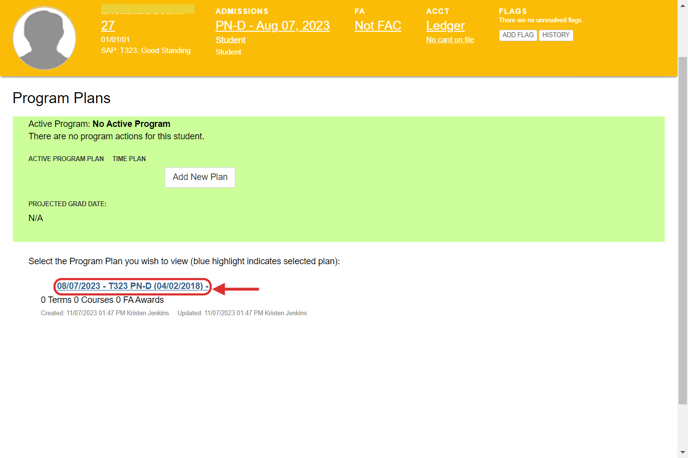
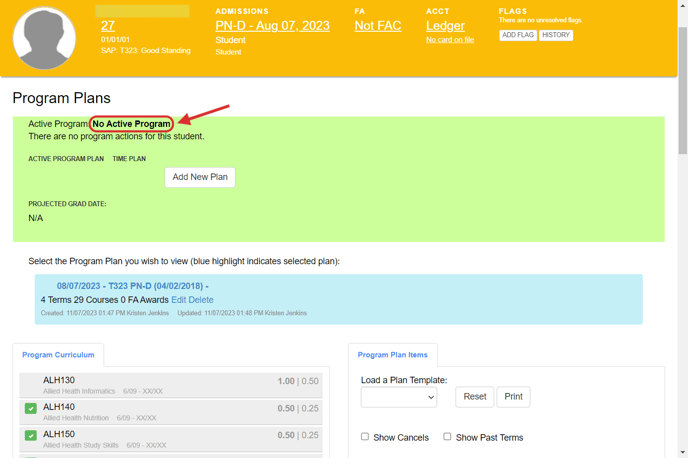
The Program Plan will be in the blue box until the student is admitted into a program and in the active population.
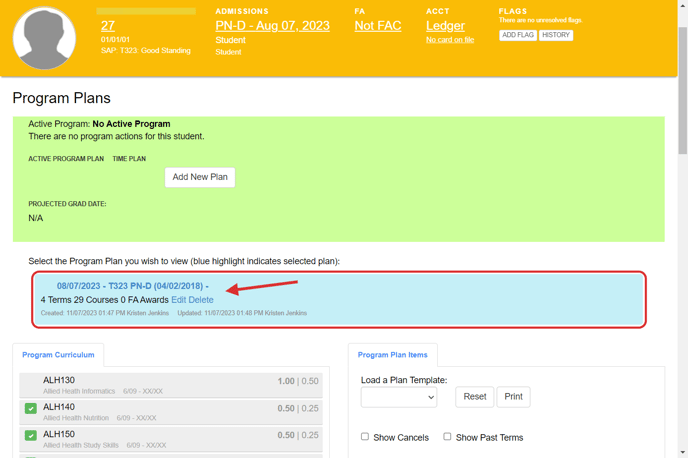
There will be no active plan till the student is admitted into the selected program.
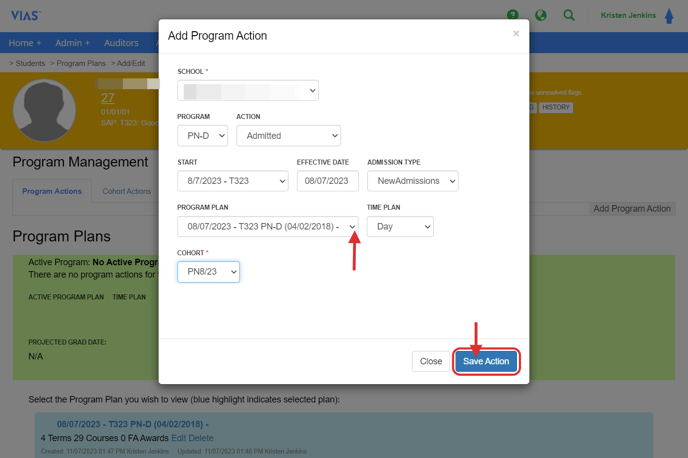
How to admit the student into a program.
1. Go to Add Program Action.

2. Choose the school/campus.
3. Choose the program.
4. Choose Admitted for Action.
5. Choose the start date.
6. Type the effective date. The effective date MUST be the same date as the start of the term.
7. Chooses the Admission type.
8. Add the program plan.
9. Choose a time plan.
10. Add a cohort if applicable.
11. Click Save Action.
Now the student has a projected grad date.
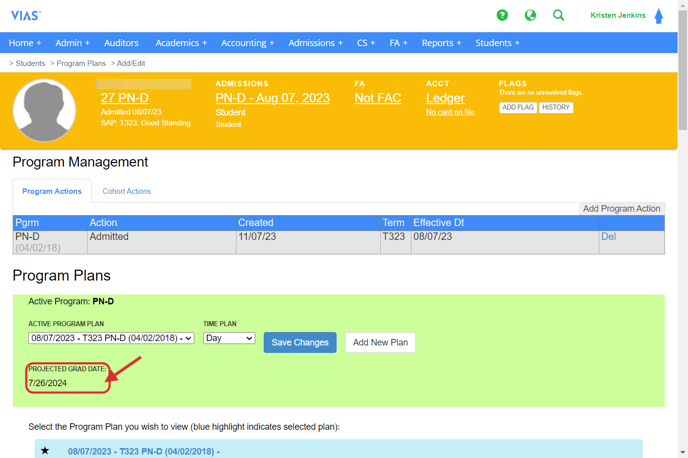
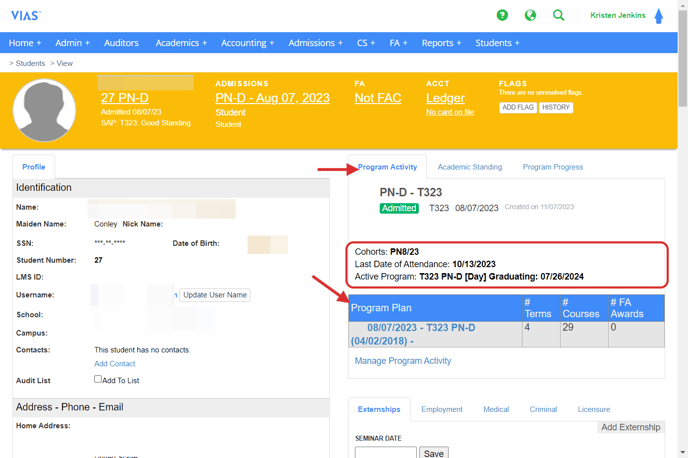
Now the student's program activity tab lists the following information:
- admit program action
- admitted cohort (if applicable)
- Last date of attendance
- active program plan
- projected graduation date