The Gradebook for the entire institution is found under the Academics Tab > Grading System > click on Gradebook. When students are enrolled in course sections, they are automatically enrolled into the gradebook for that course. Students are able to view their gradebook for each class in real-time on their Student Portal. Some administrative users will have access to all gradebooks, while faculty members will just have access to the courses they teach. It is usually the responsibility of the instructor, program director, or dean to set up the Gradebooks for each course. They can then be copied for subsequent terms.
- Go to the Academics Tab > Grading System > click on Gradebook
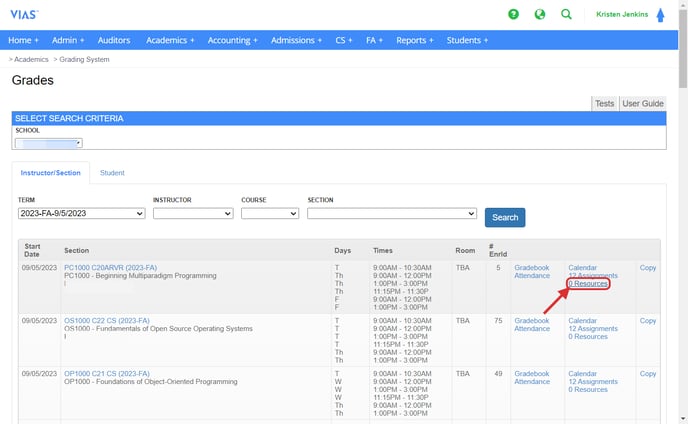
- This page is searchable by term, instructor, and section.
- Click Search.

The Gradebook Search Screen contains the following for each Course:
-
- Course Number
- Meeting Days and Times
- Link to the Gradebook for the course
- Link to Attendance for the course
- Calendar of the course that is driven by the Gradebook
- Link to Assignment Management Screen
- Course Resources uploaded by the Instructor
4. Click on the blue Gradebook button next to the class you’d like to view.
5. This will open the gradebook for that class.
Setting up the Gradebook
Click here for the full article of setting up gradebook criteria - Creating Gradebook Criteria
The first step in setting up your gradebook criteria is establishing how the category average will be calculated. Evenly gives every item within the category equal weight. Point based offers weight as the function of the item. Max points are divided by the sum of all max points in a category. It is important that students know how their grade is calculated. Using the "Assignment Report" to show detailed list of the students assignments and how the assignment fell into each criteria along with the points or percentage earned will demonstrate how the student their grade in each criteria. The gradebook system is designed to correspond with the instructor's syllabus. Program director have the choice to set up gradebook criteria and lock the criteria section from the instructor.
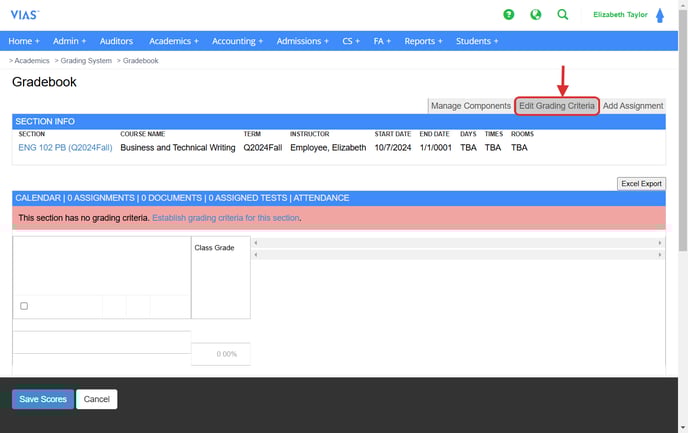
1. This is a blank gradebook ready to be set up. The first step for setting up the gradebook is to edit the grading criteria. Click on Edit Grading Criteria.
2. Add Grading Criteria.
3. Type each category of the criteria.
4. Type in the total weight of each category within the weight box.
5. Click on Add Grading Category and continue to add categories until the total weight meets 100%.
6. Instructors can drop the lowest grade by typing a 1 in the drop lowest grade. This will drop the lowest grade. One could also drop the highest grade, if need be.
7. Restrictions can also be added here.

How to add Assignments to the Gradebook
Click here for a detailed article of adding and editing gradebook assignments - How to add assignments
Assignments can be adding in exams, quizzes, and other special assignments into the gradebook. All items in which the instructor is using to monitor student progress, to demonstrate understanding within course curriculum, or monitor professionalism can be added to the assignment section to a specific category created in the gradebook criteria. Instructors add the assignment to the category along with the total points and then this is display within the student portal for students.
.webp?width=512&height=344&name=add%20assignments%20(1).webp)
Managing Gradebook Components
Click here for a detailed article of adding gradebook components - Managing Grading Components in Setting up the Gradebook
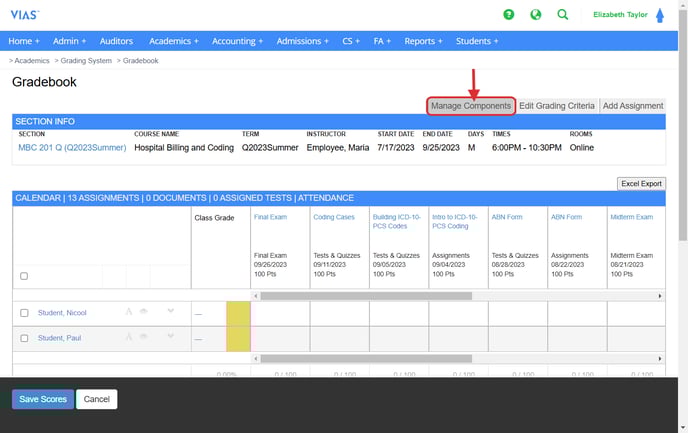
After entering gradebook criteria and adding in assignments, an instructor can add components into the gradebook. Components create a rule that the average of a group of assignments must be at or higher then the average set. For example, the syllabus states students must have 70% average on all exams, using components in the gradebook can help the instructor progress monitor this rule as the student completes each exam.
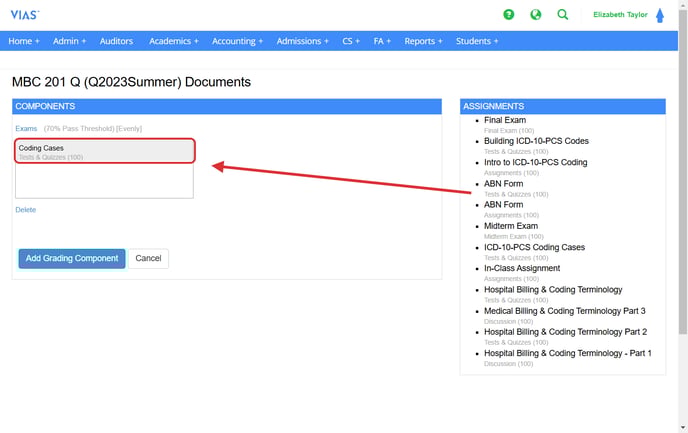
1. Type in the Component Name.
2. Type the pass threshold.
3. Choose the Grading Standard.
4. Save the Component.

5. Drag and drop the items from the assignments of the gradebook into the component box. The average of all of these assignments will determine if the student met the components rule.
How to Enter Grades in the Gradebook
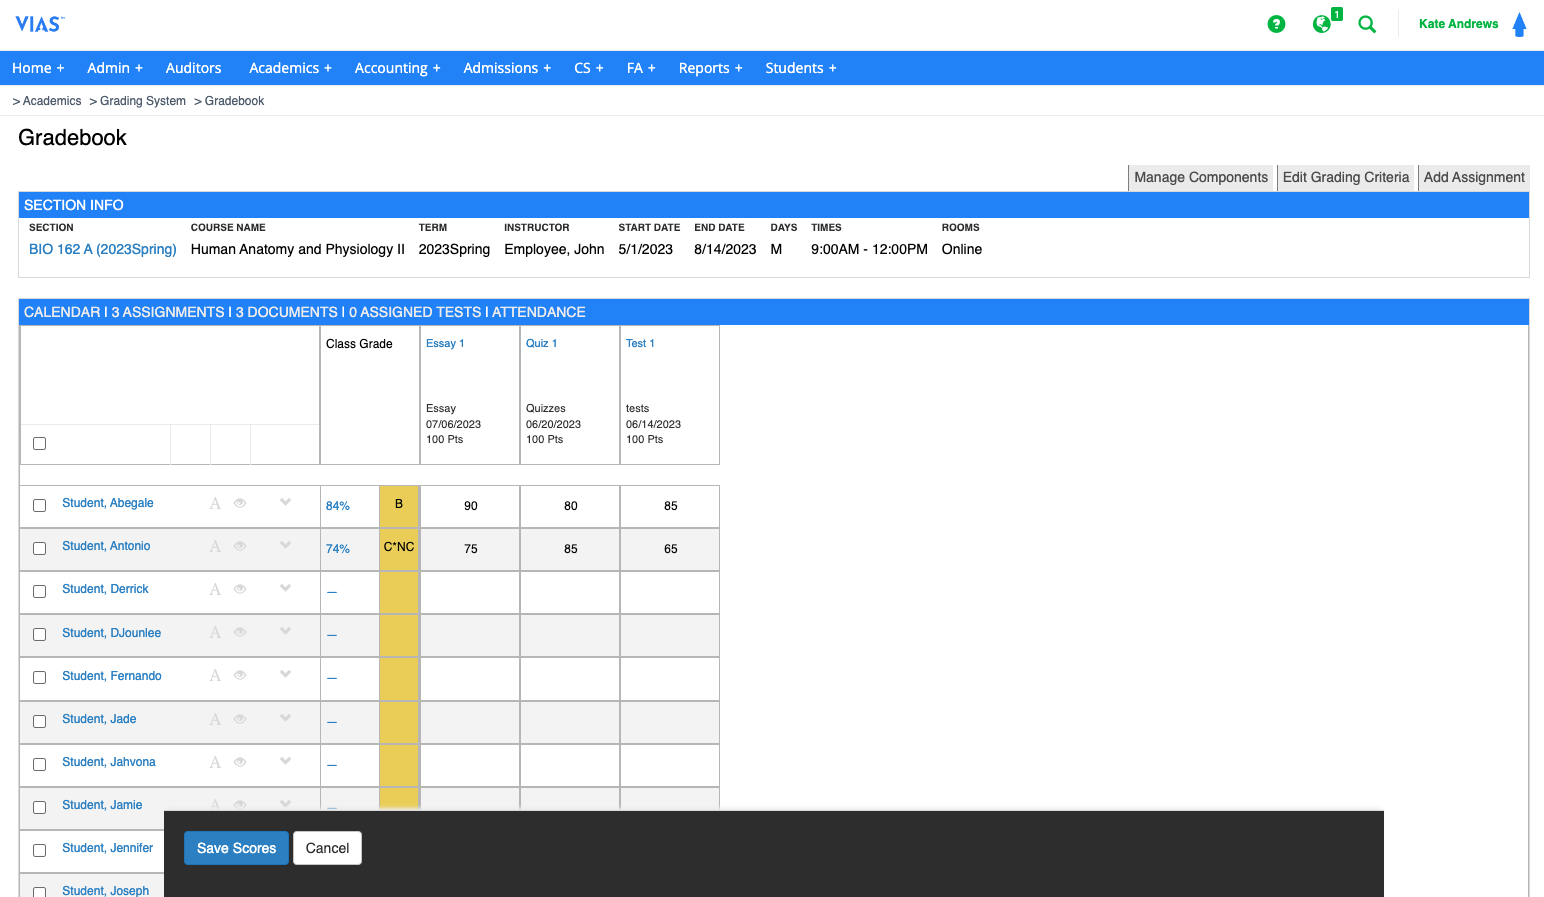
Instructors will enter the score for each assignment, quiz, etc. and click Save Scores.
This will also update the gradebook on the Student Portal.
Choose the assignment/task.
- Click into the box by the student’s name.
- Type in the grade.
- Precede down the section roster, adding in grades.
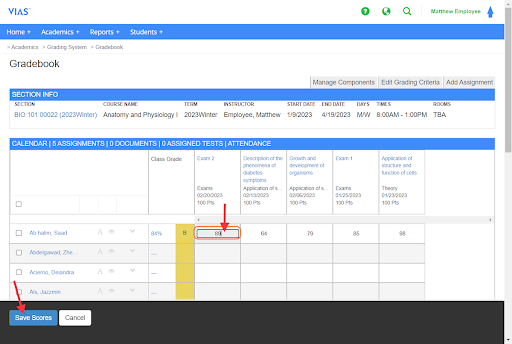
4. Click Save Scores. This will update the gradebook on the Student Portal.
5. Based on the Grading Scale entered for the course and the Grading Criteria, VIAS will automatically calculate the current running grade for each student in the course.
6. Grades are not finalized until the Green Eye and a letter grade is selected for each student.
Student grades must be finalized to appear on official and unofficial transcripts.
The Running Grade
Click here for the full detailed article about the Running Grade. - The Running Grade
The running grade will update automatically as each grade is entered in the gradebook. The running grade will also appear within the student’s portal.
Click the running grade to be directed to the student view of the grading system within the student’s profile. This screen will display the following:
- Student’s running grade
- Each task separated by grading category
- The average grade for each category
- Name of task
- Due date
- Score
- Weight distribution
- instructor comments.
This screen can be printed by right clicking your mouse and selecting the print option within your windows settings.
Instructors can use this function for various purposes: share the breakdown of the student’s grade with the student, add comments within the gradebook, or assign a grade for the task.
- Click the Item Name.
- Click in the box under Comments and add notes for each student to review.
- Click in the box under Score and add each student’s score for the assignment.
Click on the article above to learn specific details about the running grade.
How to Finalize Grades
Grades for each student must be finalized for them to appear on unofficial transcripts, official transcripts, on the Enrollment tab on the Student Page. Grades must be finalized for grades to be visible on the program plan for registrars/FA.
Once its confirmed that all assignments, quizzes, tests, etc. grades have been entered for each student, click on the drop down arrow next to the student’s name.

1. Use the drop down arrow to see final letter grades to select.
2. Instructors MUST select a final letter grade for EACH student within the roster.
3. Click the gray eye and turn it green. This symbolizes that the student's grade is final and the registrar will know the section is complete and ready.
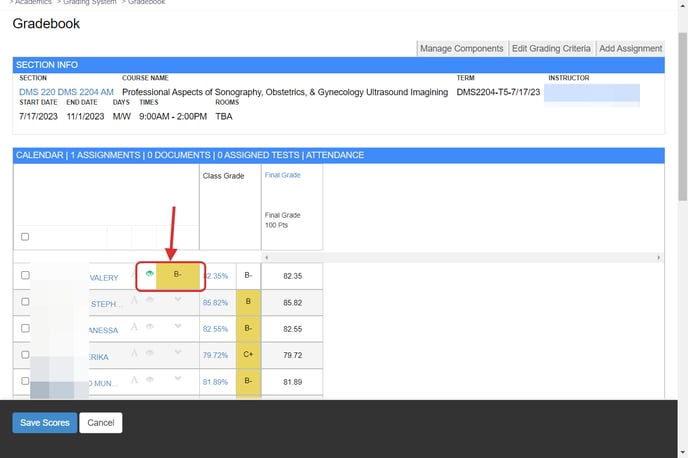
This gradebook currently has 1 student with a final grade. The instructor must add a letter grade from the drop down for each student and must turn the gray eye green. The instructor must also save the student's scores with the blue button at them bottom.
8. Grades are not finalized until the Green Eye and a letter grade is selected for each student.
9. Click the blue Save Scores button.
10. Wait for the Success Scores Updated message to appear.

Student grades must be finalized to appear on official and unofficial transcripts.
For an overview of the Gradebook, please watch this video. Not all details are included in the video. Please review articles within this training document for a complete picture of setting up and using the Gradebook System.
Gradebook Auto lock within the Grading System
Click here for the full detailed article about the auto lock on the gradebook. - Gradebook Auto Lock within the Grading System
Instructors will need to enter grades within 48 hours after the course ends. The gradebook will auto lock and the registrar must unlock the gradebook. Once the gradebook has been locked, instructors and Program Directors will not be able to change grades for their courses. They will need to contact the Registrar to complete that action.
The gradebook lock is in place, so grades are entered in an appropriate manner and to have proper documentation of why a grade needs to be changed.
If the instructor misses the 48 hour window:
- The registrar must unlock the grade for the instructor. Then the instructor will have an additional 48 hour window to enter grades or correct attendance.
- Instructor would submit final grades or attendance corrections to the registrar.
How to Message Students from your Gradebook
Click here for the full article of messaging students from the gradebook - How to Message Students in your Gradebook
Instructors can quickly message the students in a given class by going to the Gradebook. You can choose to message all of the students in the class or just check the box next to the students that you need to message.
How to Upload Course Resources
Click here for the full article of uploading course resources to the gradebook for students to use within the student portal. - How to upload Course Resources
Many different types of course resources such as videos, links, documents, etc. can be added to each class. These Course Resources will appear in each student’s portal who is enrolled in the course.
How to copy Gradebook Components, Criteria, Assignments, Resources and Documents from one Section to another section term to term
Click here for the full article - How to copy Assignments and Documents
The entire Gradebook settings can easily be copied for subsequent terms so as to efficiently duplicate the gradebook and all resources for each course. The section number must be created for the next term in order to copy the assignments and documents.
There is no need to re-do each thing term after term. Just simple copy each item from section gradebook to the next term's section gradebook.